Raspberry Pi
If you have not bought a WingBox or rented a CandyBox or you do not have a dedicated server/laptop to run a SuitestDrive on, you should consider using a Raspberry Pi.
Prerequisites
To set up your Raspberry Pi you will need:
- Raspberry Pi (
3B,3B+,4Bor5) - Power supply
- for Raspberry Pi
3B/3B+please use 5.1V, 2.5A micro USB power supply - for Raspberry Pi
4Bplease use 5.1V, 3A USB-C power supply - for Raspberry Pi
5please use 27W USB-C power supply
- for Raspberry Pi
- Network cable
- RJ-45 connector
- HDMI / Micro HDMI cable (depending on the model) with a screen (only for initial start/diagnostics)
- micro SD card
- minimum 8 GB
- SD card OS image
Setting up the Raspberry Pi
Before you start connecting the Raspberry Pi to your infrastructure, you will need to load our operating system image on an SD card.
Loading image on SD card
You will need to have a micro SD card with a minimum of 8 GB storage.
- Download our OS image.
- Download and install an image writing tool that works with your Operating system (the following steps describe using Etcher)
- Connect an SD card reader with the SD card inside
- Open Etcher and select the downloaded image file (
suitest-rpi-image.zip) - Review the selections and click Flash! to begin writing data onto the SD card
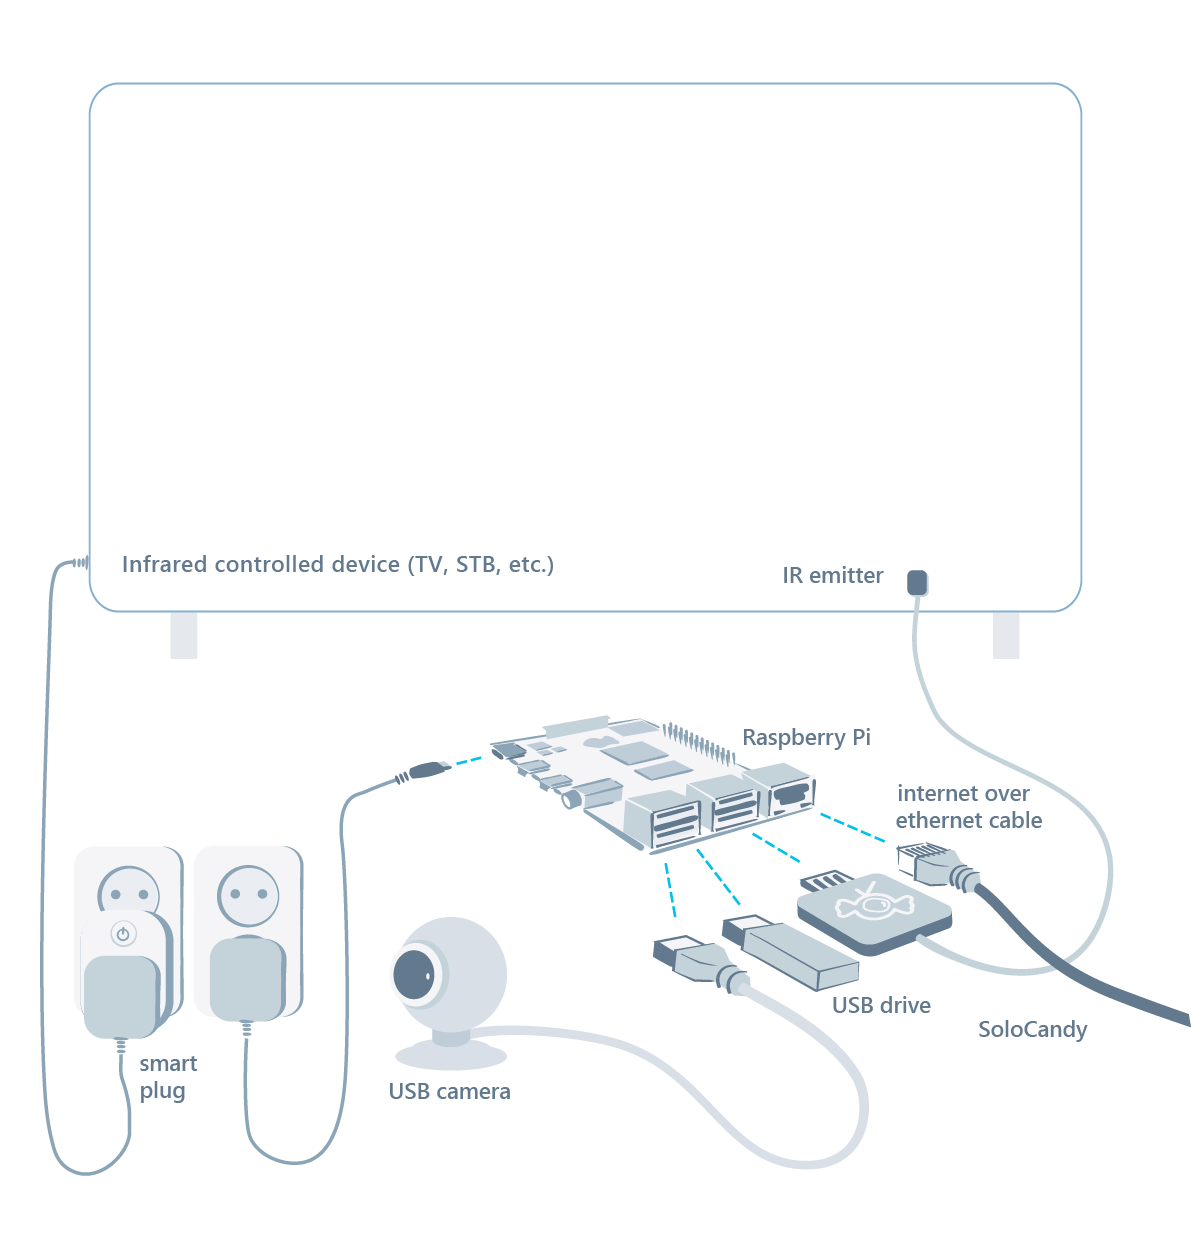
Connecting to your infrastructure
Make sure to follow the steps based on the following order (power outlet needs to be the last step):
- Plug the SD card into the Raspberry Pi.
- Plug the network cable into the Raspberry Pi.
- COnnect the Raspberry Pi to an HDMI monitor via an HDMI cable.
- Turn on the Raspberry Pi by plugging a power outlet.
The Raspberry Pi will now expand the image from the SD card. You will see the process on the HDMI monitor. Once you see Device ID on the screen along with other information, you are ready to move to the next step.
Adding the Raspberry Pi device into Suitest account
This section applies also to WingBox.
The Raspberry Pi is now up and running, therefore, the next step is to add it to your Suitest account. Just make sure that you have Manage Devices permission.
- Log in your Suitest account
- Check that you are switched to the correct organization
- Go to Devices → Advanced
- Click Add new Raspberry Pi button inside the Raspberry Pi section
- Fill-in the form based on the data that were visible on the screen before
Recording a driver
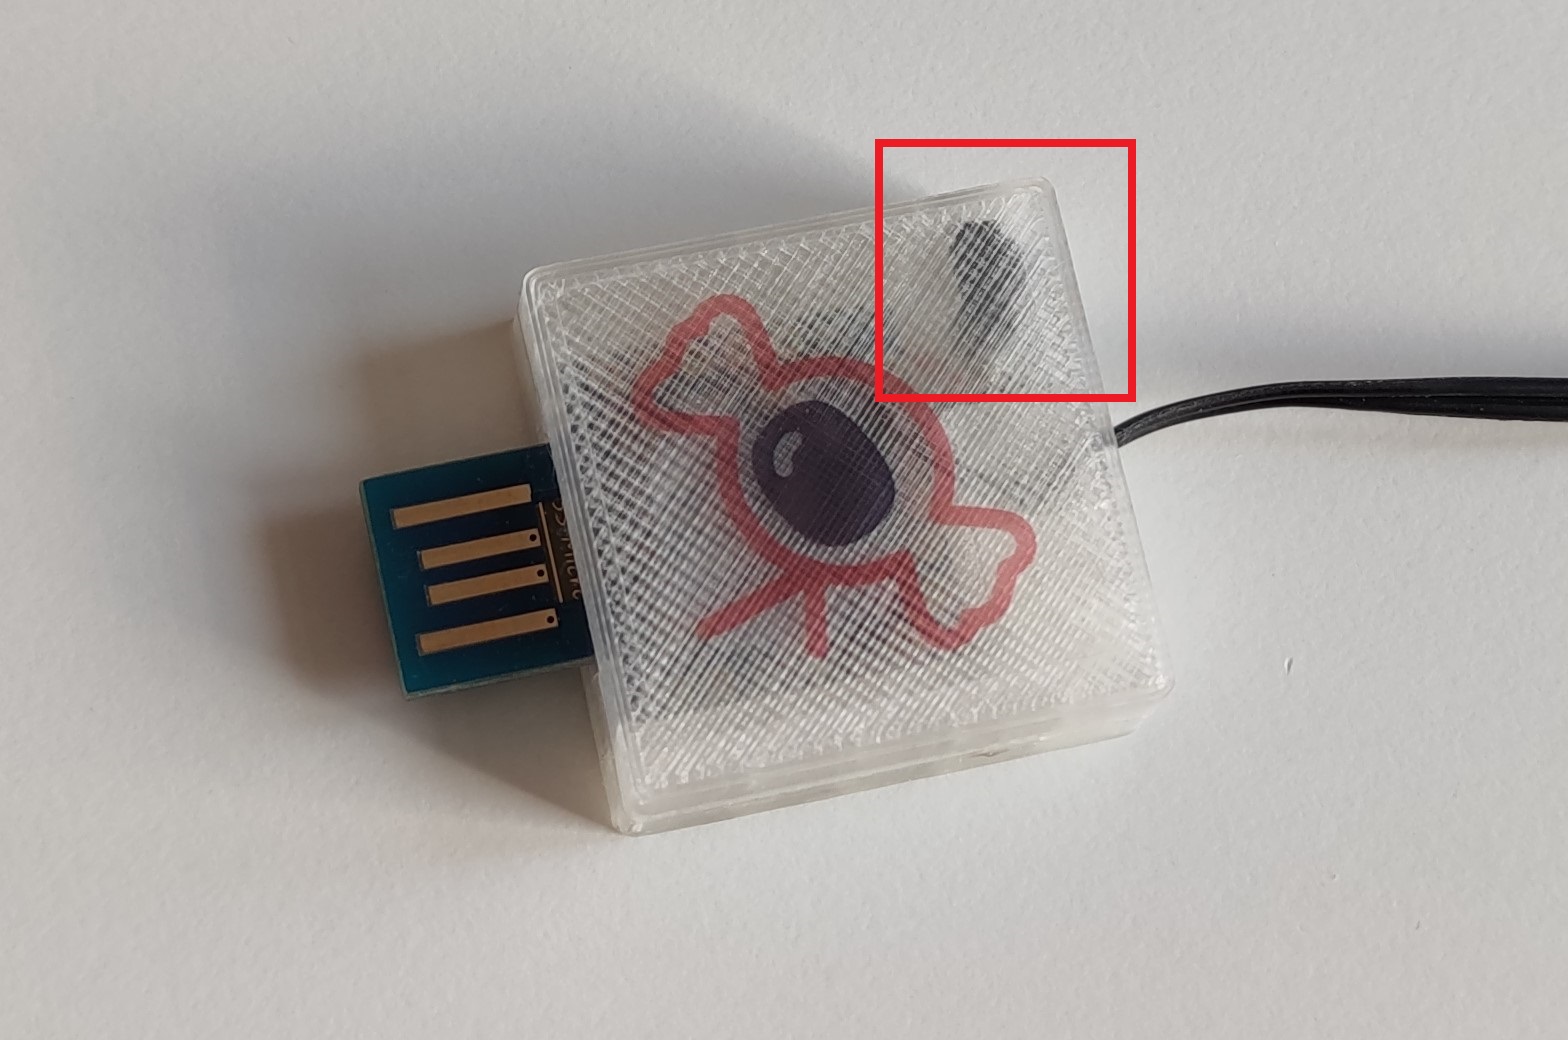
When recording a driver for your device, you need to aim your remote control at the backside of the SoloCandy box.
Enabling SuitestDrive
If you want to enable SuitestDrive on your Raspberry Pi, please check the following page.
Using SoloCandy
If you wish to use a SoloCandy with your Raspberry Pi, please check this page.
USB camera / UVC image capture device
This device can be used for:
For setting up the image capture device, See what is happening on your device's screen during the test run with a USB camera / UVC device.
Assigning the UVC device to a testing device
Plug the UVC device into one of USB ports of the Raspberry Pi. Suitest will automatically detect it as another image capture device. In order to use the UVC device in connection to a particular testing device:
- Open given testing Device details
- Go to Settings tab
- Select the UVC device under Image capture selection
Streaming
Once you assigned the UVC device:
- Connect to your testing device
- On the VRC, click on Start streaming button
- Select the configuration and click Start
- Open the stream inside our web UI (button Watch here) or in separate browser tab (button Live testing)
If the UVC device is not assigned to any testing device, you can still watch the stream. Just find it inside the list of Streaming devices and click on "Start streaming" icon on the right side.
Recordings and screenshots
Make sure that the UVC device has been properly assigned.
Regarding the recordings, based on your use case, visit the following pages of our user documentation:
- Recording of a test written in our web-based test editor.
- Recording of a Suitest JavaScript API session.
In addition to that, you can also get screenshots from a device during a test execution.
Smart plug
Switch the power of your devices on and off with a smart plug.