Instrumenting Android applications
- Android TV
- Fire TV
- Whale TV
- Android mobile
Only
.apkpackage file extension is supported.
Assuming that you use Gradle, then instrumenting Android application requires only a few easy steps. Before continuing you should have a working Android device in your Suitest account.
If you are using a video player, which is not based on
VideoViewclass, take a look at this page.If you want to test Jetpack Compose toolkit or Accessibility service elements, take a look at this page.
Minimum API level 21 (Android 5.0), minimum build API level 25
The app must be built with a minimum API level of 25, however it can be tested on a device with Android OS with API level 21+ (Android 5.0 and newer versions). If you are unsure about the API level, contact your android app developer.
If you want to track the version number of our Android instrumentation library, please see this source.
Native applications
Automated instrumentation of native application
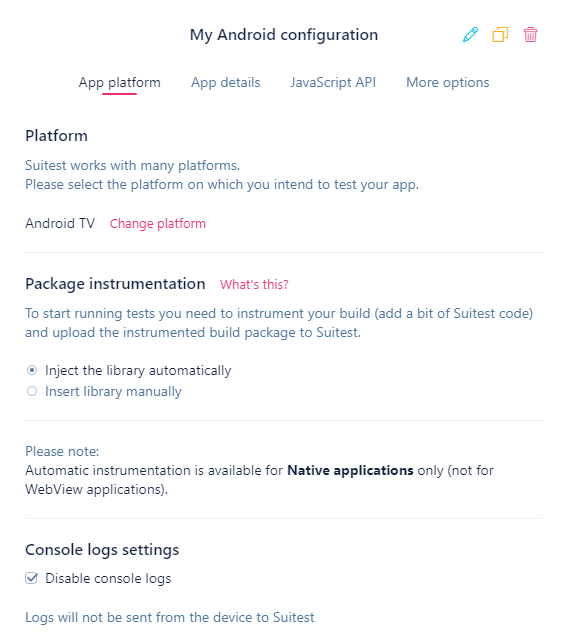
In case of Android native applications, Suitest supports automated injection of the instrumentation library. You just need to use "Inject the library automatically" option inside the configuration and upload your application package. Please note that the automated instrumentation will sign the application package with debug key.
Using ProGuard/obfuscation
If you use ProGuard for your builds, either turn it off for packages that you use with Suitest, or use manual instrumentation (see below). Using automated instrumentation on ProGuarded or obfuscated builds can lead to crashes due to missing classes or methods.
Manual instrumentation of native applications
-
Download the Suitest instrumentation library for Android and copy it into the
libsfolder. -
In your
build.gradlefile add the following code. If you are unsure on what to do please refer to ourbuild.gradleexample and the troubleshooting section.If you want Suitest to work only with debug builds:
dependencies {
    // Minimal version for suitest is 25.2.0, you can use any higher.
    debugImplementation 'com.android.support:appcompat-v7:25.2.0'
    debugImplementation 'com.google.code.gson:gson:2.8.0'
    debugImplementation 'org.java-websocket:Java-WebSocket:1.5.1'
    debugImplementation(name:'SuitestIL', ext:'aar')
    releaseImplementation(name:'SuitestILproduction', ext:'aar')
}
If you want Suitest to work in all modes including release:
dependencies {
    // Minimal version for suitest is 25.2.0, you can use any higher.
    implementation 'com.android.support:appcompat-v7:25.2.0'
    implementation 'com.google.code.gson:gson:2.8.0'
    implementation 'org.java-websocket:Java-WebSocket:1.5.1'
    implementation(name:'SuitestIL', ext:'aar')
}
You must also add
flatDir{dirs 'libs'} as shown in the following example:allprojects { repositories { jcenter() flatDir { dirs 'libs' } } } -
Extend the
Applicationclass by initiation of Suitest instrumentation inside theonCreatemethod.Instrumented code should look similar to the following example:
public class MainApplication extends Application {

    @Override
    public void onCreate() {
        super.onCreate();
        SuitestInstrumentalApplication.init(this);
    }
}
Set up a different process to be instrumented
By default the main
android:processis instrumented and the other ones are ignored. If you wish to test a different process (not the main one), you need to addSuitestInstrumentalApplication.setProcessName("processName")line above theinit()method and replaceprocessNamewith the name of the process that you want to test.public class MainApplication extends Application { @Override public void onCreate() { super.onCreate(); SuitestInstrumentalApplication.setProcessName("processName"); SuitestInstrumentalApplication.init(this); } }
HTML hosted (WebView) applications
If you are using Cordova for WebView app creation, please follow the instructions from our guide. Otherwise follow the instructions below.
Android System WebView version lower than 61
If the version of Android System WebView on your device is lower than 61, you may encounter issues with touch gestures. Make sure that your HTML page's viewport is set up without scaling. For more information, please visit official documentation.
-
Download the Suitest instrumentation library for Android and copy it into the
libsfolder. -
In your
build.gradlefile add the following code. If you are unsure on what to do please refer to ourbuild.gradleexample and the troubleshooting section.If you want Suitest to work only with debug builds:
dependencies {
    // Minimal version for suitest is 25.2.0, you can use any higher.
    debugImplementation 'com.android.support:appcompat-v7:25.2.0'
    debugImplementation 'com.google.code.gson:gson:2.8.0'
    debugImplementation 'org.java-websocket:Java-WebSocket:1.5.1'
    debugImplementation(name:'SuitestIL', ext:'aar')
    releaseImplementation(name:'SuitestILproduction', ext:'aar')
}
If you want Suitest to work in all modes including release:
dependencies {
    // Minimal version for suitest is 25.2.0, you can use any higher.
    implementation 'com.android.support:appcompat-v7:25.2.0'
    implementation 'com.google.code.gson:gson:2.8.0'
    implementation 'org.java-websocket:Java-WebSocket:1.5.1'
    implementation(name:'SuitestIL', ext:'aar')
}
You must also add
flatDir{dirs 'libs'} as shown in the following example:allprojects { repositories { jcenter() flatDir { dirs 'libs' } } } -
Extend the
Applicationclass by addingSuitestInstrumentalApplication.webViewInit(this);to theonCreatemethod. The final result should look like this:public class MainApplication extends Application { @Override public void onCreate() { super.onCreate(); SuitestInstrumentalApplication.webViewInit(this); } } -
Insert the following code before you load content into the WebView.
SuitestWebViewInstrumentation.instrument(webView); -
In order to unregister the
webView, insert the following code:SuitestWebViewInstrumentation.unInstrument(webView);The most common place would be inside
onActivityStoppedmethod (depending on where you have added theinstrument()method in the previous step). -
Instrument your HTML hosted app.
Copy and paste the code snippet from the Suitest configuration page into every HTML file of your hosted application. For best results put it as the first script element in your HTML file right after the opening
tag.
Open URL in WebView
For Open URL to work inside of WebView you need to adjust WebViewClient with shouldOverrideUrlLoading method returning false. Read more in the Android developer documentation.
debugCompile
debugCompile will include the Suitest IL to debug builds only.
releaseCompile will include an empty (without functionality) Suitest IL
that only contains the method SuitestInstrumentalApplication.init(this) which is
necessary to avoid receiving errors on release builds, it will not alter or effect
your release builds. If releaseCompile line is not included then you'll need to
remove all Suitest code added from each release build.
ProGuard
If you are using ProGuard add the following code to your ProGuard configuration file to suppress irrelevant warnings and allow the instrumentation library to function correctly:
-dontwarn st.suite.**
-dontnote st.suite.**
-keep class st.suite.android.** {*;}
Uploading the build to Suitest
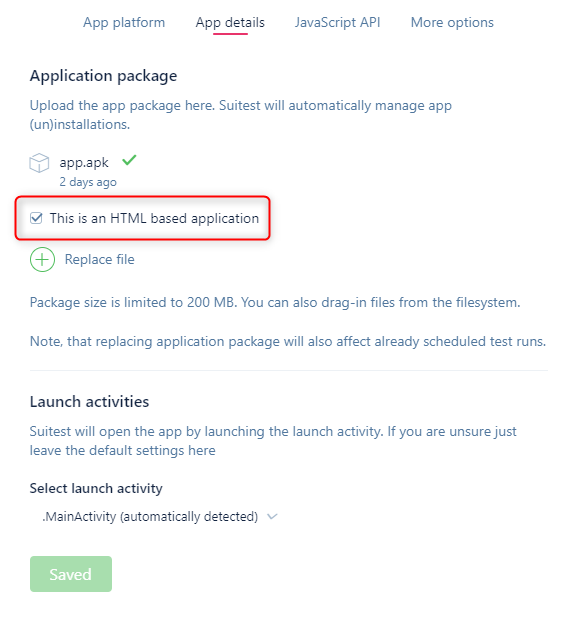
After you have instrumented the code create a development build of your application and upload it at the Suitest configuration page. If you are using an HTML hosted (WebView) app then do not forget to check the "This is an HTML-based application" checkbox under the file name before saving.

Suitest will automatically install or update the package on the device as necessary when you try running the app on this device.
The app build must have the
versionCodeincremented, so that Suitest knows to re-install the new package. Read more about it inside of Android developers documentation.
If you use Suitest Network API you can also send the package with an API request. Suitest will automatically install or update the package on the device as necessary when you try running the app on this device.
Disabling console logs
In some cases, the logs from Android devices can lower down the performance. Due to this behavior, Suitest allows the users to disable sending of the application logs from the device to Suitest together with not storing them inside the results in order to increase the performance.

Selecting launch activity
Suitest will open the app by launching the launch activity. If you are unsure just leave the default value there.
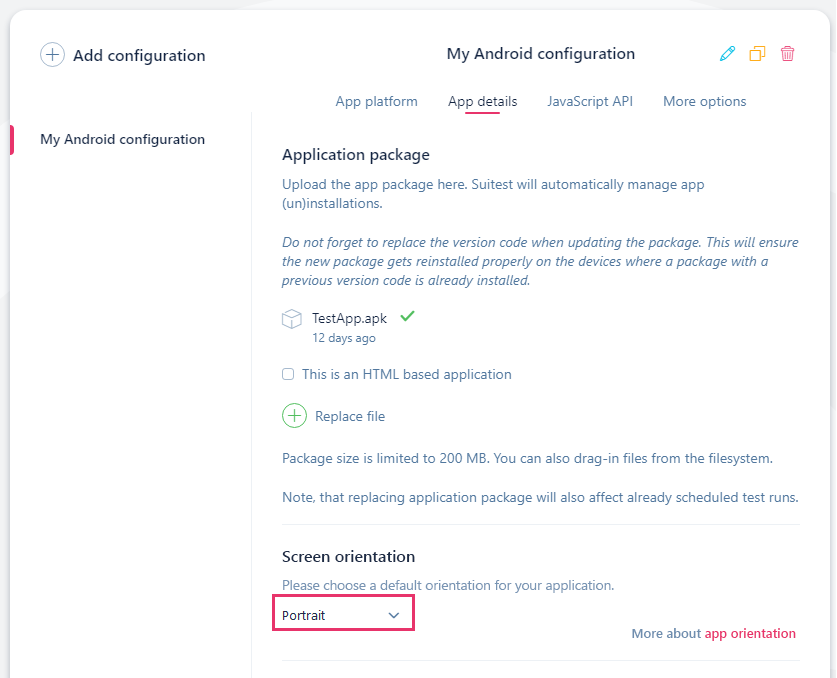
Setting up the screen orientation
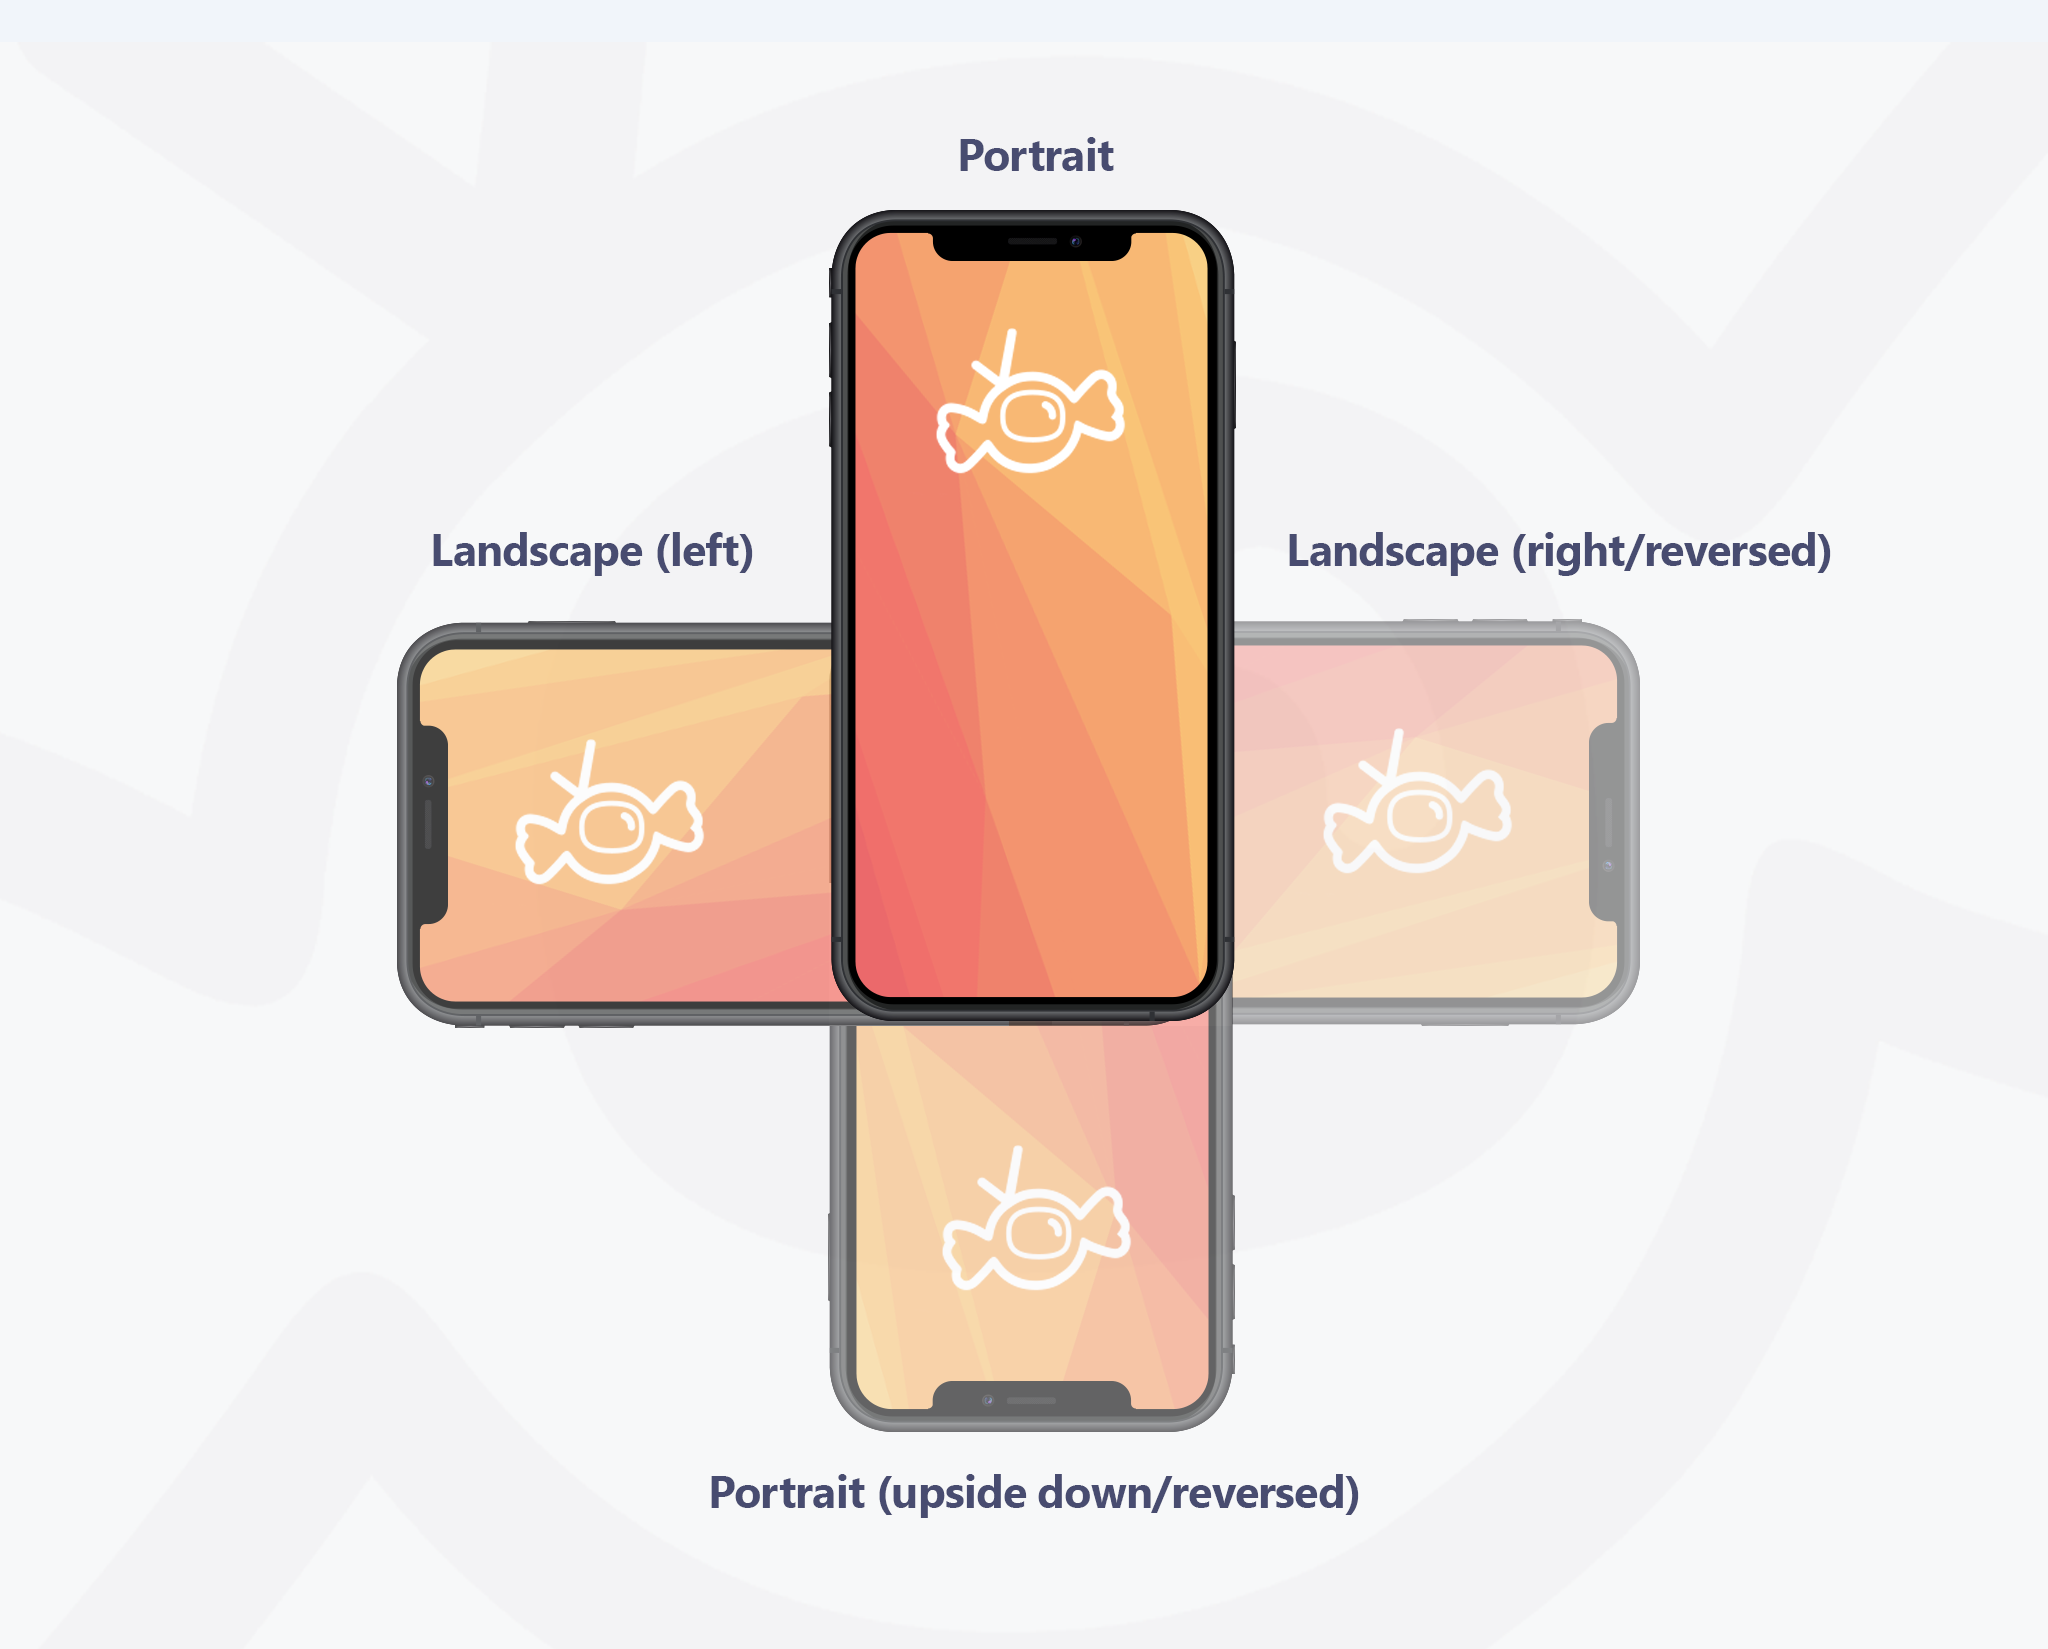
Sets the orientation of the app on the device screen to one of the following values:
- Portrait
- Portrait (upside down/reversed)
- Landscape (left)
- Landscape (right/reversed)

Suitest allows you to set up the screen orientation for your app execution inside a configuration. If you do not explicitly set up the orientation, application will be executed in the Portrait orientation.

Setting up Suitestify
You can optionally set up Suitestify with any HTML-based hosted application.