CandyBox
The CandyBox is a device designed to operate both infrared-controlled and network-controlled devices.
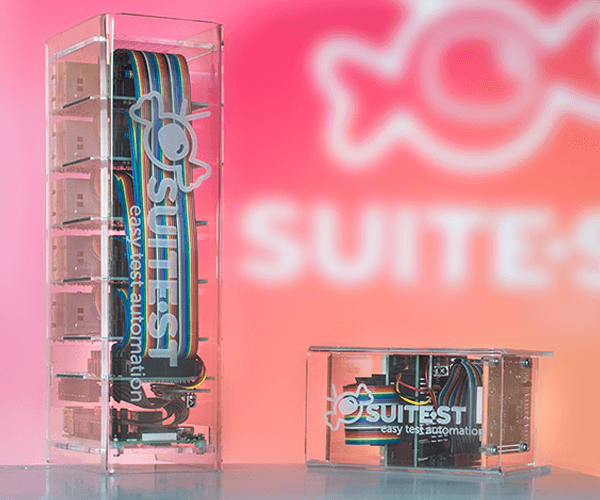
The CandyBox is a hardware control unit designed and made by Suitest for operating TVs, set-top boxes and other devices through their infrared receiver. A single CandyBox is able to operate up to 40 devices independently and you can have as many CandyBoxes as necessary in your Suitest account. Order the CandyBox through your account.
You can order a CandyBox by contacting our sales team. However, we recommend ordering a WingBox instead.
Package contents
When you receive the CandyBox, the package contains:
- The CandyBox
- Power supply
- 8 (+ 1 spare) or 40 infrared blasters
Prerequisites
A couple things that will be needed before installation:
- Dynamic Host Configuration Protocol (DHCP) enabled within your local network. If you are unsure if it is enabled, please ask your local network administrator.
Setting up the CandyBox
Make sure to select a location in the room for the CandyBox where it is visible. The CandyBox contains a built-in infrared recorder in order to allow you to record a driver for your device. For that, the CandyBox needs to be in sight.

Plug in the network and power cables
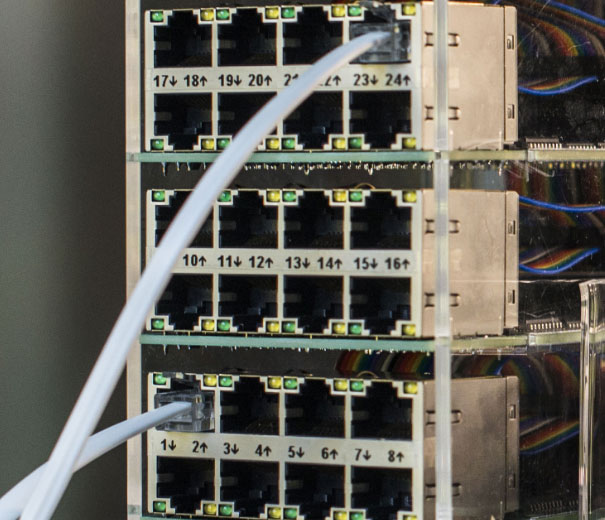
The network socket is located at the back side of CandyBox in the bottom-left just below the 8 or 40 infrared control ports. Attach the network cable to the bottom left RJ-45 socket.
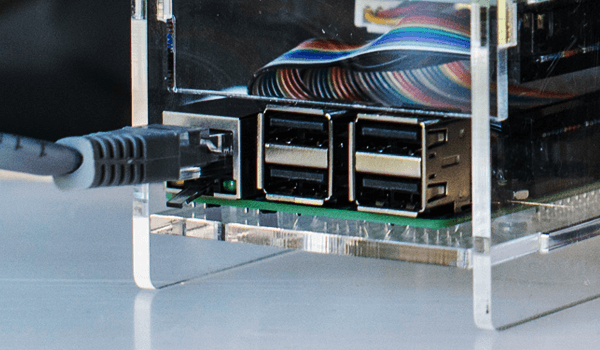
WARNING: Do not plug in the network cable into any of the numbered control ports. This could damage the box or your network equipment. The network cable must be plugged into the bottom left RJ-45 socket which does not carry a number.
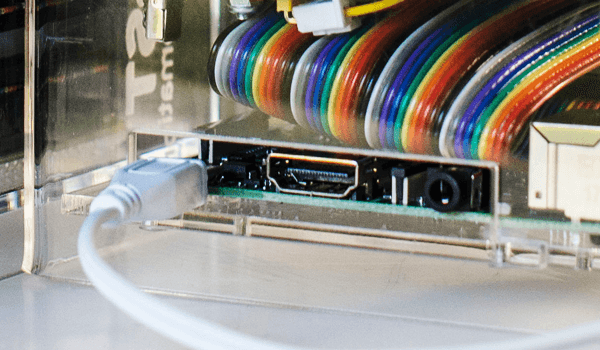
The power socket is located on the right side (when the Suitest logo on CandyBox is facing you). Plug the power cable into the socket.
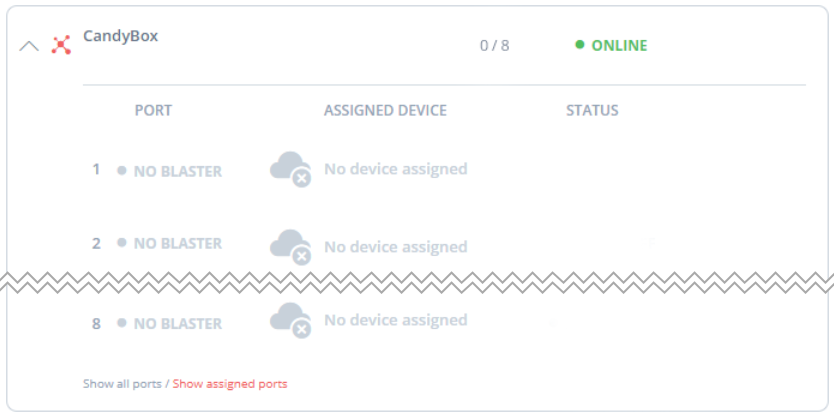
Once the CandyBox is plugged in, you will see the bottom board power up (red and green) then the network socket (green). After about 30 seconds the control ports will start blinking orange, this means the CandyBox is fully booted and ready for use. Now go to your account and open the control units tab.
You should see your CandyBox listed there. The CandyBox status should be online and you should be able to see the list of infrared emitters.
The CandyBox is a device that needs to be on and online all the time. There is no need to turn off the CandyBox through the night or during non-business hours. On the contrary, you'll want your devices to be accessible all the time, so just leave it plugged in.
Connecting a device
Once you see the CandyBox as online in your account, you can start connecting your infrared controlled devices.
Attaching the infrared blaster
First, you need to furnish your devices with the infrared blasters.
To set up the blaster, do the following:
-
Locate the position of the infrared receiver (see detailed instructions).
-
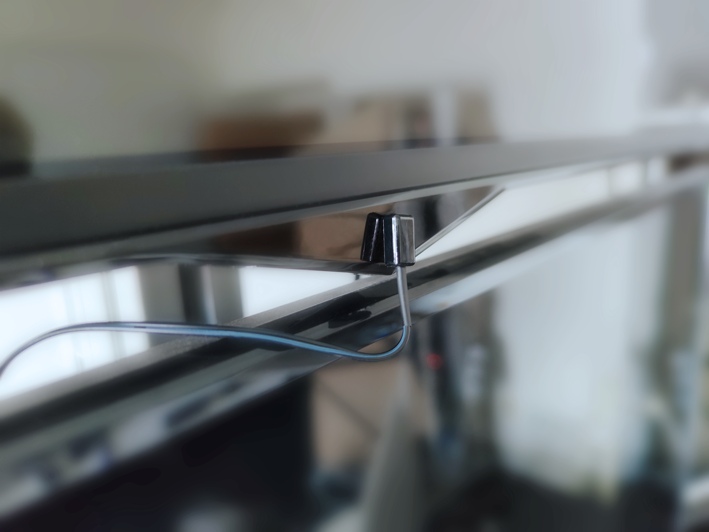
Stick the coupler end of the Suitest infrared blaster into convenient position at the back of your device.
-
Peel off the protective foil from the back of the Suitest infrared blaster and then stick the blaster onto the infrared receiver.
-
If you need to extend the cable, use a network cable (RJ-45, CAT4) or a telephone cable (RJ-11, 4 wires) and a coupler. Plug the other end into a port on the CandyBox. A CandyBox has either 8 or 40 control ports and all are independent.
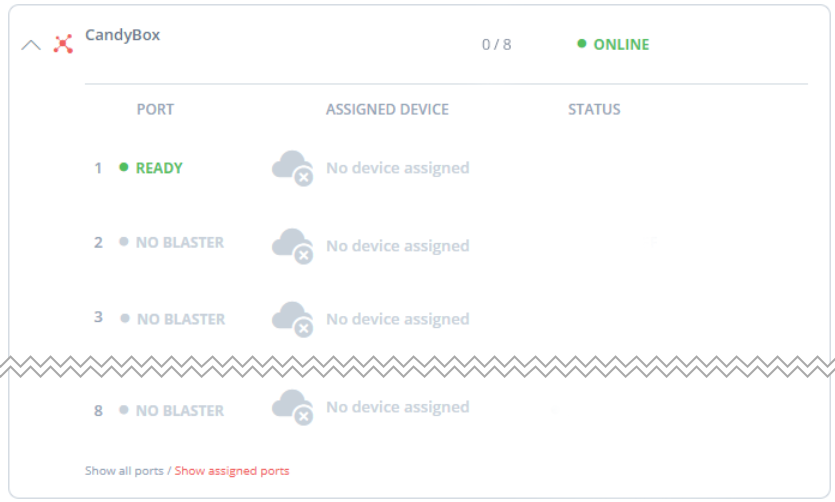
In the CandyBox management area
of your account, you will be able to see the status of the unplugged infrared
blasters. The infrared blaster which you have just plugged in should have the
status READY.
Add TV or set-top box to Suitest
After you have finished configuring the CandyBox launch the Add device wizard to configure your first device.
On the first screen select Add physical device and then select the platform which you would like to configure. Depending on the platform some additional configuration steps may be required:
- Configuring HbbTV or Freeview Play devices.
- Configuring an LG webOS device.
- Configuring a Samsung Tizen device.
- Configuring a general purpose Smart TV device.
Record your own driver
Suitest has a database of infrared codes for thousands of devices. Should you come across a device having a yet unknown set of codes, you can record the driver yourself. The process won't take longer than 3 minutes and Suitest will guide you through it.
When recording own driver, you can skip some buttons and record them later (see more information).
Control port status
Suitest monitors the status of every control port of the CandyBox and updates the status on the control units page. Port statuses have the following meaning:
-
READY- A blaster is connected to this port and everything looks right. -
NO BLASTER- The port is OK but there seems to be no attached blaster. If the blaster is physically connected this message implies that either the cable or blaster itself may be broken. Try replacing the cable first and check if the status changes toREADYelse replace the blaster. -
PAIRING- The blaster on this port is currently being used in the Add device wizard. -
PORT ERROR- The control port is malfunctioning, if the issue persists contact support.
Enabling SuitestDrive
Control Android, Roku and Xbox devices with your CandyBox by enabling SuitestDrive on CandyBox.
USB camera / UVC device
See what is happening on your device's screen during the test run with a USB camera / UVC device.
Smart plug
Switch the power of your devices on and off with a smart plug.